PokePath TD Route 1-1 Guide: Best Team to Beat Articuno
Route 1-1 is the first major hurdle in PokePath TD. While the early waves are easy, many players get stuck on Wave 100 when the legendary bird Articuno appears. Articuno has massive HP and can freeze your towers. To beat it, you need to master the map's unique terrain: a huge Water Zone in the center and a U-shaped Land Path at the bottom.
Route Guide
Route 1-1 is the first major hurdle in PokePath TD. While the early waves are easy, many players get stuck on Wave 100 when the legendary bird Articuno appears.
Articuno has massive HP and can freeze your towers. To beat it, you need to master the map's unique terrain: a huge Water Zone in the center and a U-shaped Land Path at the bottom.
In this guide, we will show you the exact 10-unit team composition you need to dominate Route 1-1, utilizing both water and land units for maximum efficiency.
🗺️ Map Analysis: The "Water Trap"
The key to Route 1-1 is the central lake.
- Water Units (Blue Zone): Units placed here can attack enemies on the top path AND the bottom path. This effectively doubles their DPS.
- Land Units (Green Zone): The bottom path is your "Kill Zone." This is where you should place your heavy hitters to finish off weakened enemies.
- Mountain (Red Zone): There is a crucial mountain tile on the right side. This is the only spot for high-ground vision.
🏆 The Best Team for Route 1-1 (10-Unit Setup)
This lineup is optimized for Level 100 accounts, but it works perfectly fine at lower levels too.
1. The Water Squad (Control & AOE)
Place these 5 units in the central lake (from left to right):
- Omastar (Left): With its Swift Swim ability, its attack speed doubles in water. It acts as a machine gun for early waves.
- Corsola (Center-Left): The MVP. Its Ring-shaped attack has a massive range (300 at Lv 100). It applies a Slow effect to almost the entire map.
- Samurott / Feraligatr (Center): Your water-based Boss killer.
- Lapras (Center-Right): Adds a Paralyze (Stun) chance. This is crucial for stopping Articuno if it gets past your slows.
- Octillery (Right): The Sniper. With a range of 480, it can hit enemies the moment they spawn.
2. The Land Squad (The "Kill Zone")
Place these units on the bottom grass path:
- 6. Weavile (Center): Your main DPS. At Lv 100, it has a 65% Crit Rate and deals Double Damage on crits.
- 7. Farfetch'd (Left of Weavile): Essential Buffer. It boosts Weavile's Critical Damage by 33%.
- 8. Sunflora (Right of Weavile): Essential Buffer. It provides a +20% Damage Aura to Weavile and nearby water units.
- 9. Excadrill (Corner): Shreds enemy armor.
3. The Anti-Invisible Defense
- Honchkrow (Mountain Tile): You MUST place Honchkrow on the single mountain tile on the right.
- Why? Route 1-1 has invisible enemies (like Kecleon) in later waves. Honchkrow is the best unit to reveal them before they leak.
⚔️ Boss Strategy: How to Defeat Articuno (Wave 100)
Articuno is a tanky Flying/Ice type.
- Weakness: It relies on movement. If you can stop it, you can kill it.
The Strategy:
- Slow it Down: As soon as Articuno enters, Corsola will slow its movement speed.
- Stun Lock: Lapras and Ampharos (if you bring one) will attempt to Paralyze it.
- The Nuke: Once it reaches the bottom path, it enters Weavile's range. With the buffs from Sunflora and Farfetch'd, Weavile can tear through Articuno's health bar in seconds.
Pro Tip: If you are farming gold, you can use Ditto in the water to copy Persian and hit Articuno for extra cash before killing it!
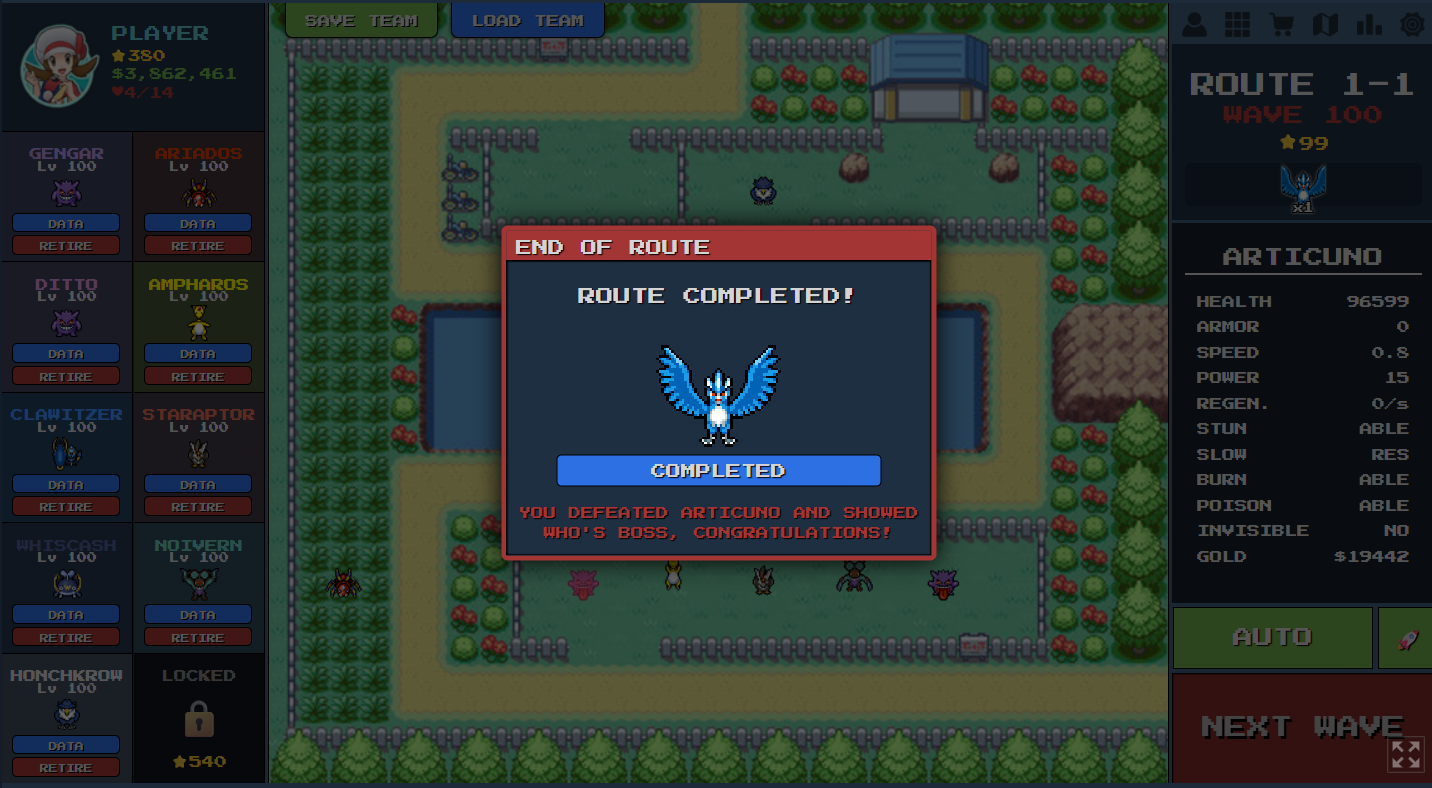
🗺️ Terrain Analysis
Route 1-1 features a unique "Water Trap" layout with a huge central lake and a U-shaped land path, creating strategic opportunities for both water and land units.
Roads & Paths
- U-shaped Land Path: U-shaped Land Path at the bottom - the Kill Zone (Long, 2 chokepoints)
- Top Path: Top path around the central lake (Medium, 1 chokepoint)
- Main Path: Main path winding around the central lake (Long, 2 chokepoints)
Water Areas
- Huge Water Zone: Huge Water Zone in the center - Water Trap (Very High strategic value) - Water-type Pokémon gain 2x power bonus, Units here can attack both top and bottom paths, Effectively doubles DPS
- Small Water Patches: Small water patches near paths (Medium strategic value) - Water-type Pokémon gain power bonus
Mountains & High Ground
- Single Mountain Tile: Single crucial mountain tile on the right side (Very High strategic value) - +30% range bonus, Only spot for high-ground vision, Must place Honchkrow here
Grass & Vegetation
- Bottom U-shaped Path: Bottom U-shaped path - Kill Zone for land units (High coverage) - Grass-type Pokémon gain power bonus, Perfect for Weavile, Farfetch'd, Sunflora
- Grass Fields: Grass fields surrounding the lake (High coverage) - Grass-type Pokémon gain power bonus
Strategic Chokepoints
- Central Lake (Water Zone): Huge water zone where Water units can attack both paths (Very High priority)
- Bottom U-shaped Path (Kill Zone): Where heavy hitters finish off weakened enemies (Very High priority)
- Mountain Tile (Right Side): Only spot for high-ground vision - must place Honchkrow (Very High priority)
⚔️ Team Composition
Early Game (Waves 1-50)
Start with Omastar and Corsola in the central lake. Omastar's Swift Swim doubles attack speed in water, making it a machine gun for early waves.
Mid Game (Waves 51-99)
Add Lapras and Octillery to the water squad. Deploy Weavile on the bottom path. Build up your control and DPS capabilities.
Late Game (Wave 100)
Deploy the complete 10-unit team: Water Squad (Omastar, Corsola, Samurott/Feraligatr, Lapras, Octillery) in central lake, Land Squad (Weavile, Farfetch'd, Sunflora, Excadrill) on bottom path, and Honchkrow on the mountain tile for anti-invisible coverage.
Related Tools
Map Overview
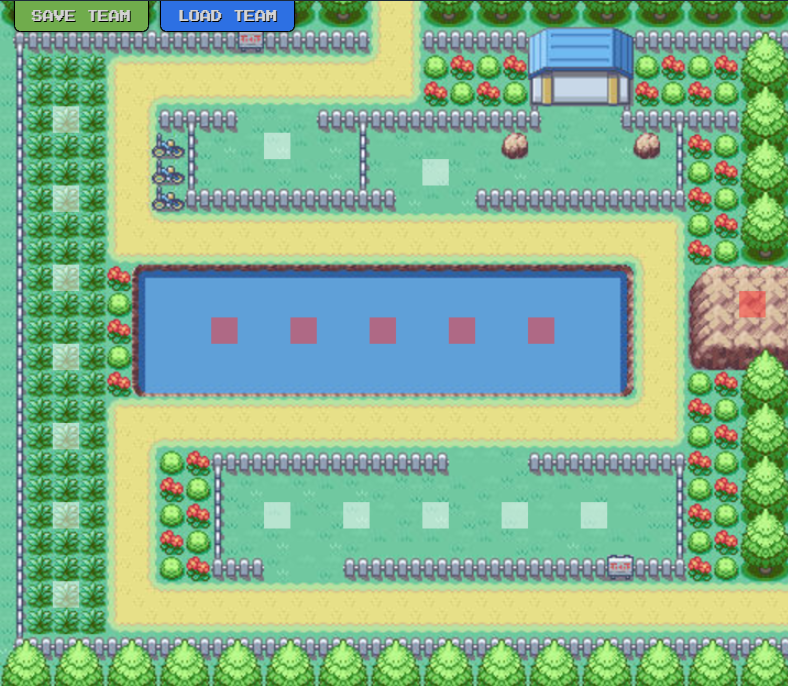
Terrain Analysis
Roads & Paths
U-shaped Land Path at the bottom - the Kill Zone
Top path around the central lake
Main path winding around the central lake
Water Areas
Huge Water Zone in the center - Water Trap
Small water patches near paths
Mountains & High Ground
Single crucial mountain tile on the right side
Grass & Vegetation
Bottom U-shaped path - Kill Zone for land units
Grass fields surrounding the lake
Strategic Chokepoints
Huge water zone where Water units can attack both paths
Where heavy hitters finish off weakened enemies
Only spot for high-ground vision - must place Honchkrow